Publish to Azure Web App in Visual Studio
The following steps were taken:
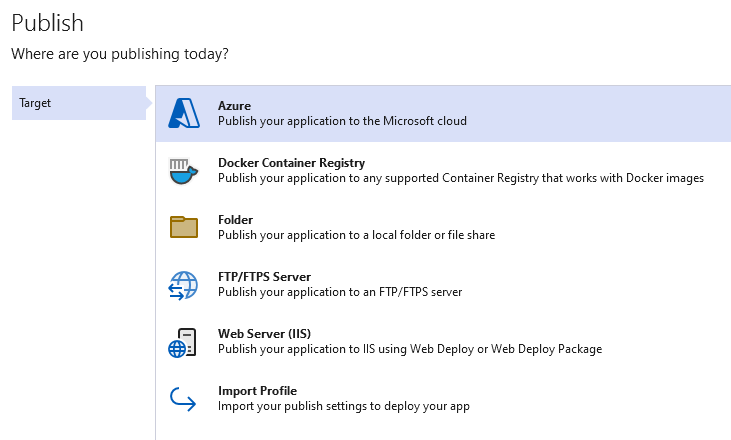
- In Visual Studio, navigate to the Web Application project in the Solution Explorer and right-click it. Select the option Publish in the context menu.
-
Target: Azure. You are presented several ways of publishing the application. I'm going to publish to the Azure Web App, so obviosuly I selected Azure.
-
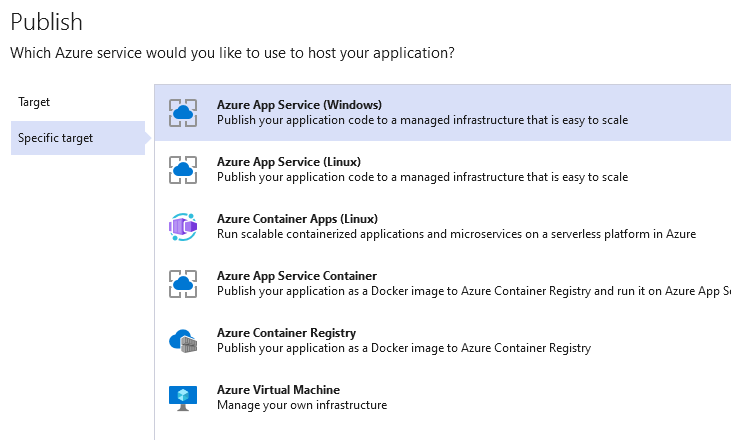
Specific target: Select Azure App Service (Windows).
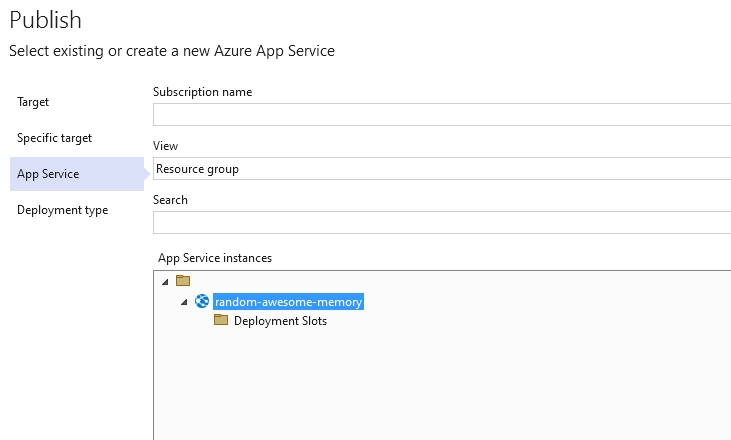
- App Service: Select the target Subscription. Make sure you're signed in into an Azure account.
-
Select Resource Group in the View control and you will see your App Service instances appear in the list.
Select the App Service you wish to publish the website to.
I selected the Web App I created in the previous article.
-
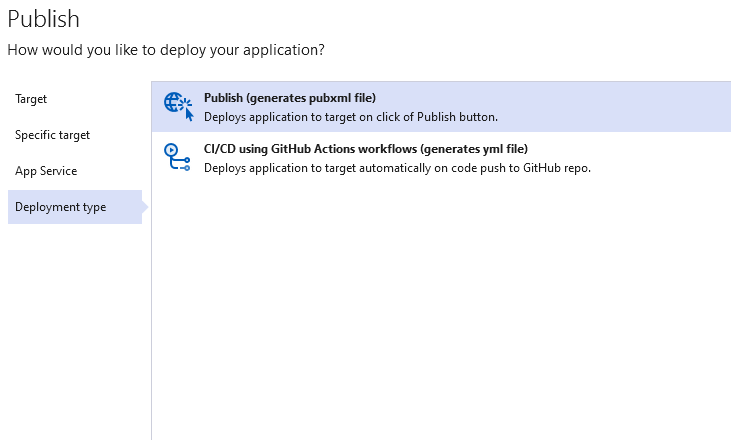
Deployment Type: Select Publish (generates pubxml file).
This way we publish the application via Visual Studio.
After that, the profile is created.
-
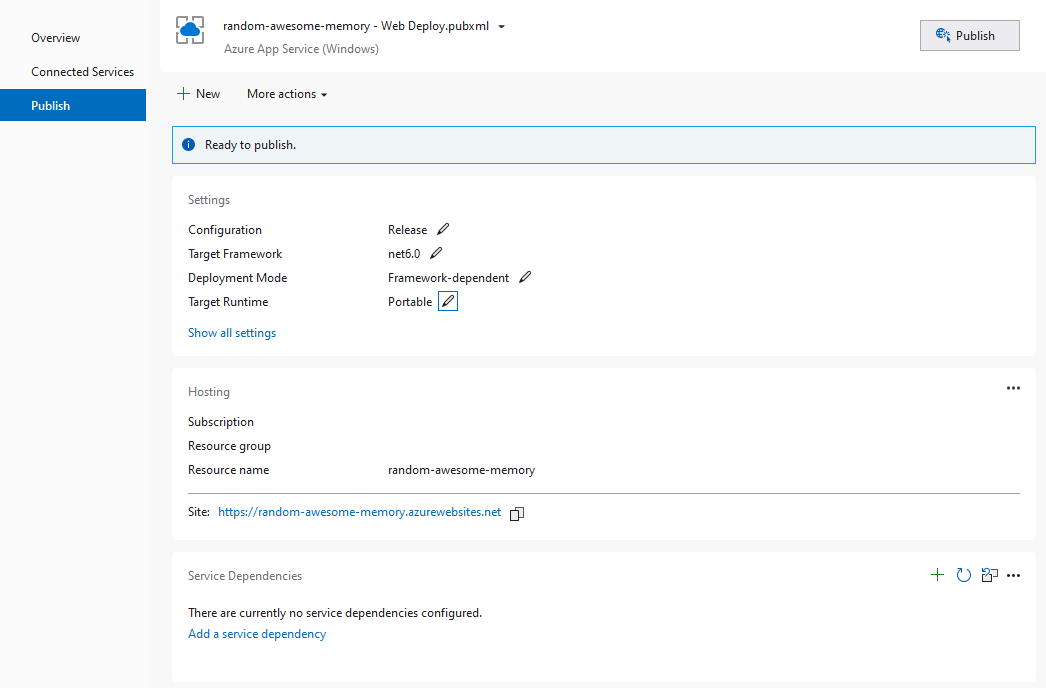
You get a detailed overview of Publish profile.
I'm leaving it as is for now.
-
Click Publish and see the magic doing its work.
After a short while, the website is published to Azure.
You get a notification in the Output console and by default, Visual Studio should open the url of the website automatically.

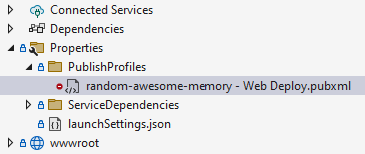
The Publish Profile can be found in your Solution under Properties, PublishProfiles, in the file {your-profile-name}.pubxml.
Azure App Publish Documentation
Check .NET application publishing overview for more publishing configuration and optionsASP.NET Core Documentation
Check Configure an ASP.NET Core app for Azure App Service on how to further configure your website in Azure App ServicesConclusion
That's a wrap. The website is running in Azure and is accessible through the url we saw earlier. As you can see, this process was so easy and didn't take a lot of time. Do keep in mind that this is a valid solution when you have a small application, website or want to test prototypes. In case of enterprise applications, this might not be a good idea to publish from a user's laptop. Instead automate your deployment using a CI/CD pipeline in Azure DevOps or Github Actions.
Documentation Reference
- Azure Portal - https://portal.azure.com
- Azure Documentation - Azure Documentation
- Azure App Publish Documentation - .NET application publishing overview
- ASP.NET Core Documentation - Configure an ASP.NET Core app for Azure App Service