Azure Cloud Solutions
I find the Azure Cloud Solutions amazing. It gives a developer so much power at the tip of the finger. If you're at a computer keyboard that is. The Azure Documentation is impecable, you can easily find what you are looking for and how to use it. So what's next on the agenda? Well first of all you need an Azure account, duh. You can find all the details about creating an account in the Azure Documentation. Once you have an account, the magic starts.
Azure Documentation
Check Azure DocumentationIn this vast landscape of technical solutions that Azure Cloud encompasses, it's easy to get lost. But you always find your way when navigating through the Azure Documentation.
So, in my case, I chose to go for a Web App Service to host my website. Most of my experience is in App Services.#choose-your-regionBut that doesn't mean it will stay like this forever. We'll see. Without going into too much detail, I described the steps I followed to accomplish my goal below. More details can be found in the documentation references.
Sign up for an Azure Account
First of all, to get started in Azure, you obviously need an Azure Account. If it's your first time, you can sign up for a free account and get some monthly credits to spend on specific resources. In case you already have an Azure account, even better, you can just navigate to the Portal.
Azure Account
Check Build in the cloud with an Azure free account to find out more details about Azure and how to sign up for an accountCreate a Resource Group
By default you get one subscription in your Azure Account. Before you can start creating resources, you need a Resource Group. In short, a Resoure Group provides a way of organizing Azure Resources, preferably related to each other and in the same physical region.
Azure Resource Group Documentation
Check Manage Azure resource groups by using the Azure portal to find out more about Resource GroupsAzure Geographies Documentation
Check Azure Geographies for more detailsIn the Azure Portal, I created a Resource Group with a logical name in a region to fit my needs. There are several naming conventions and guidelines available but in the end you choose something you feel comfortable with.
Azure Cloud Adoption Framework Documentation
Check Define your naming convention to find out more about naming conventions in the Cloud Adoption FrameworkCreate a Web App
Azure Web App Documentation
Check Create an ASP.NET web app on how to create an Azure Web AppThe next step is to create the Web App in Azure. An Azure Web App Resource is an App Service which provides a fully managed platform as a service. It allows you to deploy applications in different kinds of languages or technologies on a Windows or Linus Operating System without having to concern about the fuss of the internal workings and configurations.
Although creating a Web App can be handled automatically during the Publish process in Visual Studio, I prefer creating this manually. This way you're aware of how this works in detail. The next level would be to automate this using Infrastructure As Code (IaC). But that's a story for a another time.
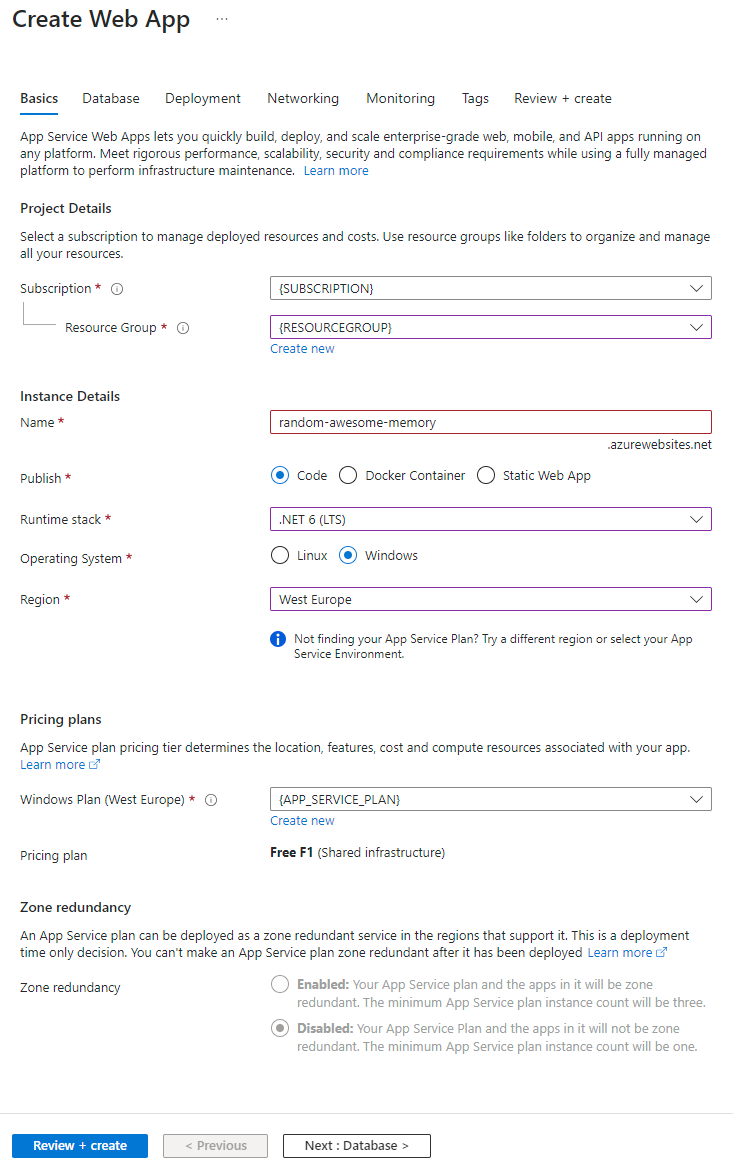
- In the Azure Portal, navigate to the top search bar and type App Services. Select the service and click + Create Web App.
- Subscription: Select your subscription
- Resource Group: Assign the previously created Resource Group.
- Name: Give the Web App a logical name. This name is used in the url to access the website when it's deployed.
- Publish: For now I'm publishing it using Code.
- Runtime Stack: This is .NET 6 (LTS) beacuase I'm deploying a .NET Core Razor application in version 6.
- Operating System: Windows.
- Region: Preferably select a region that is nearest to where you live of course. In my case that's West Europe.
- Windows Plan: Create a new Windows App Service Plan to host the Web App. I'm using the Free F1 plan for now, which is a Shared Infrastructure Plan.
- So far for the Basics setup.
- The Database setup can be skipped beacuase I won't be using that right away.
- Since I'm using Visual Studio to do the releases, I'm skipping the Deployment setup. At the time of writing, this section only supports GitHub. I'm not sure if this will evolve.
- The Networking setup doesn't apply to the Free F1 plan so that can be skipped as well.
- In the Monitoring setup, I'm enabling the Application Insights beacuase I want to monitor traffic in the website. I'm not really a fan of Google Analytics as it generates a lot of rubbish on your website and I don't want the hassle of these external influences. Application Insights works out of the box when we created the Web App. It referenced the Application Insights Resource automatically. For now this is just fine but an explicit configuration is a better, more robust idea. I'll do that later.
- Click Review + Create to finish up.
Up and Running
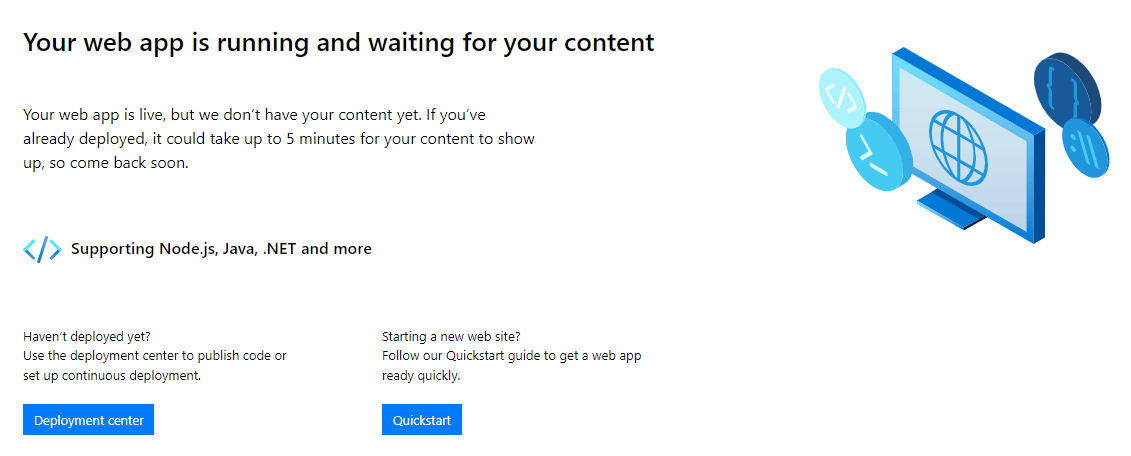
Navigate to the newly created Web App Service Resource to see the details.
In the App Service Essentials section, you will see a url that has been provided using the name that was chosen earlier.
When navigating to the url, in my case 'https://random-awesome-memory.azurewebsites.net/' a screen is shown, stating the website is up and running but doesn't have any content yet.
Conclusion
So for now, this Web App setup will suffice. In a matter of seconds I have a machine at my disposal to deploy my website, all for free whoohoow. But it's basically an empty shell, I won't get far with that. We still need to deploy the website to the Azure Web App.
Documentation Reference
- Azure Portal - https://portal.azure.com/
- Azure Documentation - https://learn.microsoft.com/en-us/azure/
- Azure Resource Group Documentation - Manage Azure resource groups by using the Azure portal
- Azure Geographies Documentation - Azure Geographies
- Azure Web App Documentation - Create an ASP.NET web app and Quickstart: Deploy an ASP.NET web app