Alternative to lower the cost
So, I was thinking. What's the alternative here to having this big cost increase? The previous App Service Plan was running on a Windows machine. And there's nothing wrong with that. But a Windows machine costs a lot more than a Linux machine, which provides the same functionality anyway. We'll come to the creation of the Linux App Service Plan later.
Azure Pricing Documentation
Check App Service pricing for more details and the difference between Linux and Windows pricing
Azure App Service Documentation
Check App Service on Linux for more details on the Linux supportAdd Docker support
So, how do we handle migrating the ASP.NET website to Docker? Well, it's actually pretty easy. First of all, you need to install Docker on your machine. Since I'm working on a Windows machine, I installed Docker Desktop for Windows. You can find the software to download here.
Docker is integrated in Visual Studio, so that makes thing a lot easier.
Visual Studio Documentation
Check Container Tools in Visual Studio for more details on the Container tooling
Generate Docker file
Ok, now that we've got that out of the way, the next step is Dockerizing the application so we can deploy it to the App Service.
For that, we need a Docker file.
When I generated the ASP.NET website from the Visual Studio templates, I didn't check the Enable Docker Support checkbox.
So there's no Docker file present in the project.
But no worries, there's no need to start all over again.
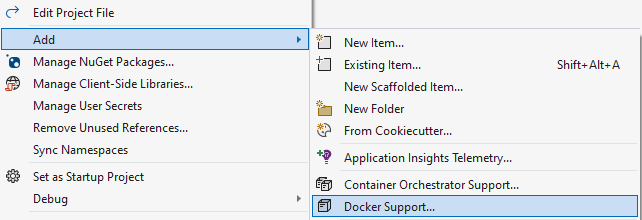
- Just right-click on the Web Application project in your Solution
- Add, Docker Support
- Select Linux
Visual Studio Documentation
Check How to customize Docker containers in Visual Studio for more details of the Docker fileBuilding the image
Visual Studio also supports building the Docker image. Just right-click the Dockerfile in your project and select Build Docker Image. It's that easy. Check the output window in Visual Studio to see the build steps and the actual command that was executed. If your prefer, or in case it's required, you can still execute your own Docker commands in the Command Line. For now I'm happy with the results.
Running the container
Although you can use the Docker Desktop app for everything Docker related, most operations are also available in Visual Studio. Open the Containers window by navigating the main menu , View, Other Windows, Containers. This way you can see all your local images as well as remote images in Azure for example.
Running the container is also integrated in Visual Studio, by just hitting the Play button on the Docker option. And voila, you can debug the Docker container. So cool.
Storing the image
Now that we have a way to generate and to run the Docker images, there's also a need to publish them remotely. You can publish them in several places like Docker Hub or in Azure Container Registry, which I'll be using from here on.
Azure Container Registry Documentation
Check Azure Container Registry for more detailsAzure Container Registry also comes with a cost.
Azure Container Registry Pricing Documentation
Check Container Registry PricingAzure container Registry Documentation
Check Azure Container Registry service tiers for the differences between the available service tiers
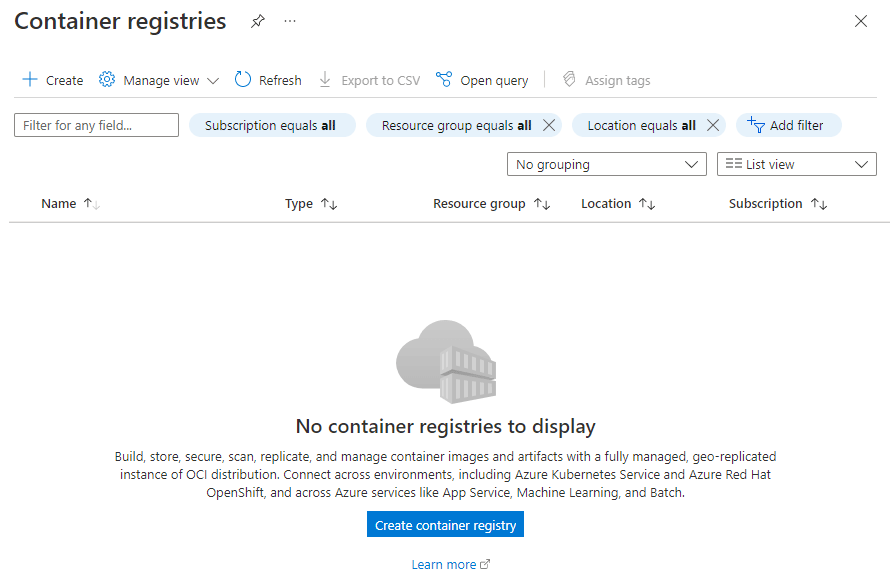
- In the Azure Portal, navigate to the top search bar and type Container registries. Select the service.
- Click Create container registry.
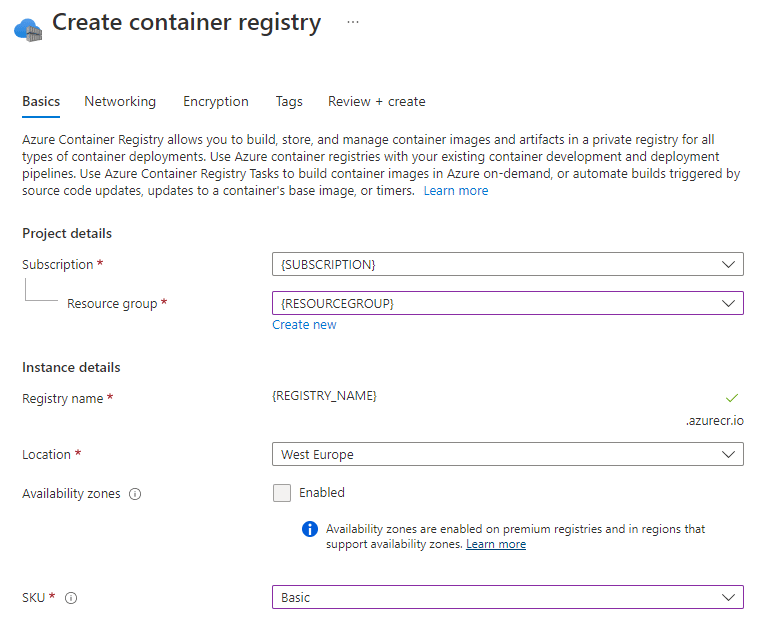
- Select a Resource group
- Choose a Registry name.
- In my case the location is West Europe.
- For the SKU, I select the Basic option, beacuase for now it's ok and it's also the cheapest.
- The other options can be skipped, they're not available in the Basic version.
- Click Create to finish up.
Azure Container Registry Documentation
Check Quickstart: Create an Azure container registry using the Azure portal for more details and optionsPublish the image
In the article Publishing the ASP.NET website to Azure, we saw how to publish an ASP.NET to and Azure App Service hosted in Windows. Now we're going to create a new Publish Profile to publish the Docker image to the Azure Container Registry. This will be used afterwards to deploy the image to the designated App Service.
The following steps were taken:
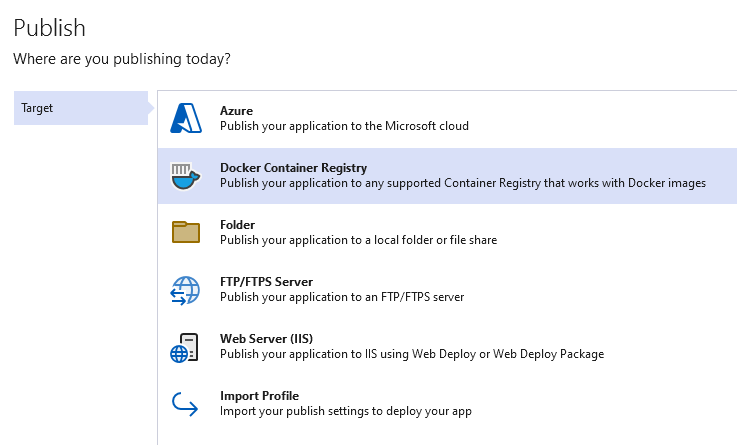
- In Visual Studio, navigate to the Web Application project in the Solution Explorer and right-click it. Select the option Publish in the context menu.
-
You are presented several ways of publishing the application. This time I'm going to publish a Docker image, so I selected Docker Container Registry.
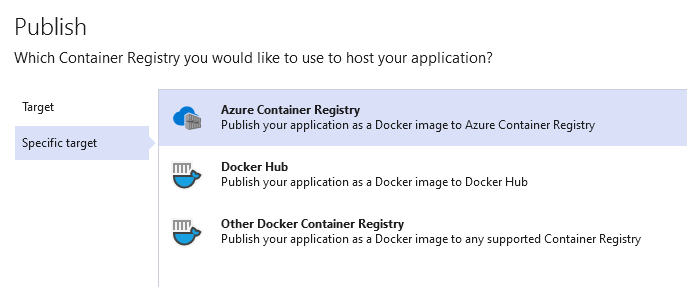
-
As specific target, select Azure Container Registry.
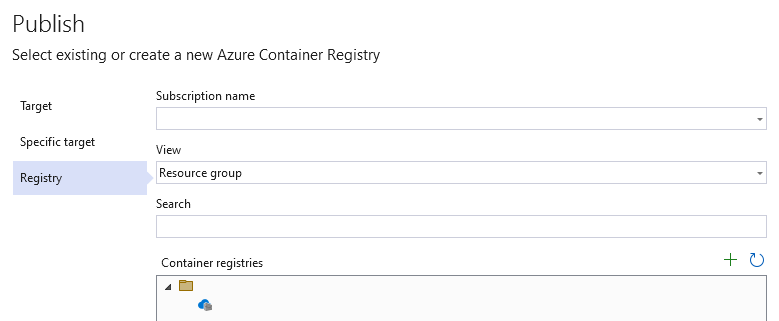
- In the App Service section, select the target Subscription. Make sure you're signed in into an Azure account.
-
Select Resource group in the View control and you will see your Container Registry instances appear in the list.
Select your Container Registry you wish to publish the website to.
I selected the previously created Container Registry.
Select Finish to create the Publish Profile. -
You get a detailed overview of Publish Profile.
Notice that the Image tag property is set to latest. I'll come back to that later.
I'm leaving everything as is for now.
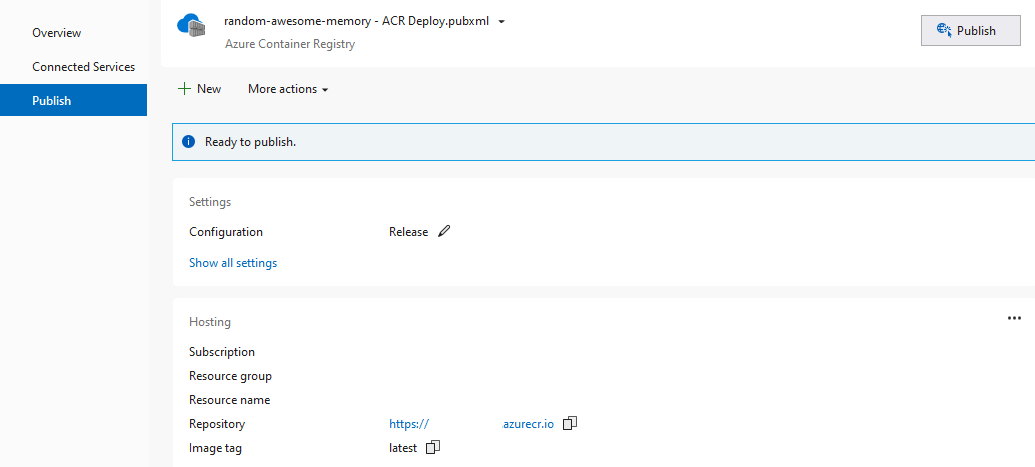
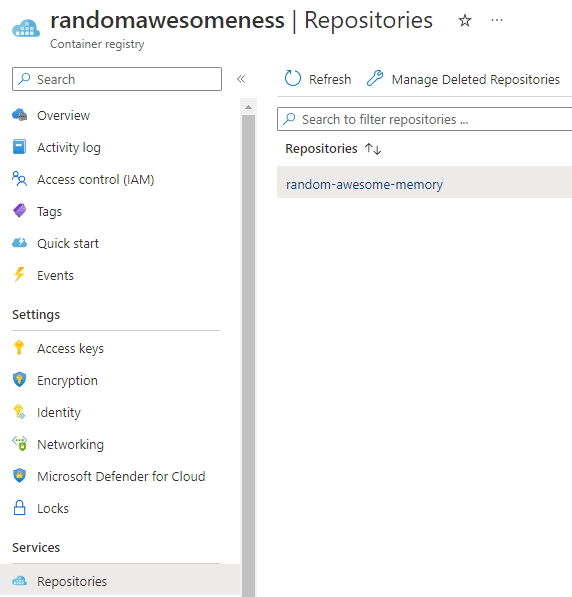
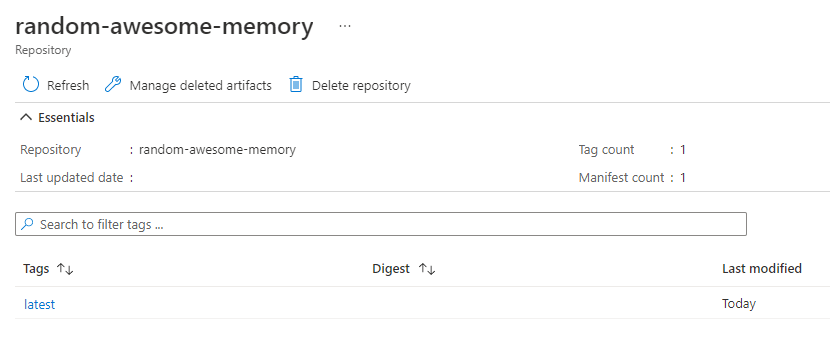
The name of this repository has been chosen by Visual Studio. For now I'm ok with that.
Click the repository to check it out. It now contains the image with the tag latest we just published.
All is nice and well, but this doesn't accomplish much. The image is just sitting there, being idle. The next thing we need to do is host the image in an App Service.
Hosting the Dockerized ASP.NET application
In one of the pervious articles Hosting the ASP.NET website in Azure, we saw how to host an ASP.NET website in an Azure App Service on a Windows App Service Plan. This time we are going to host our application in a Docker container on a Linux App Service. And as you can guess, a Linux App Service doesn't run on a Windows App Service Plan. So there's nothing else we can do than delete the previously created App Service and App Service Plan that goes with it. And then we start all over again.
We need to create a new App Service and App Service Plan to host the Dockerized application. The process is similar to the one in the Hosting the ASP.NET website in Azure. But take the following steps:
- In the Publish property, select Docker Container
- The operating system is Linux this time
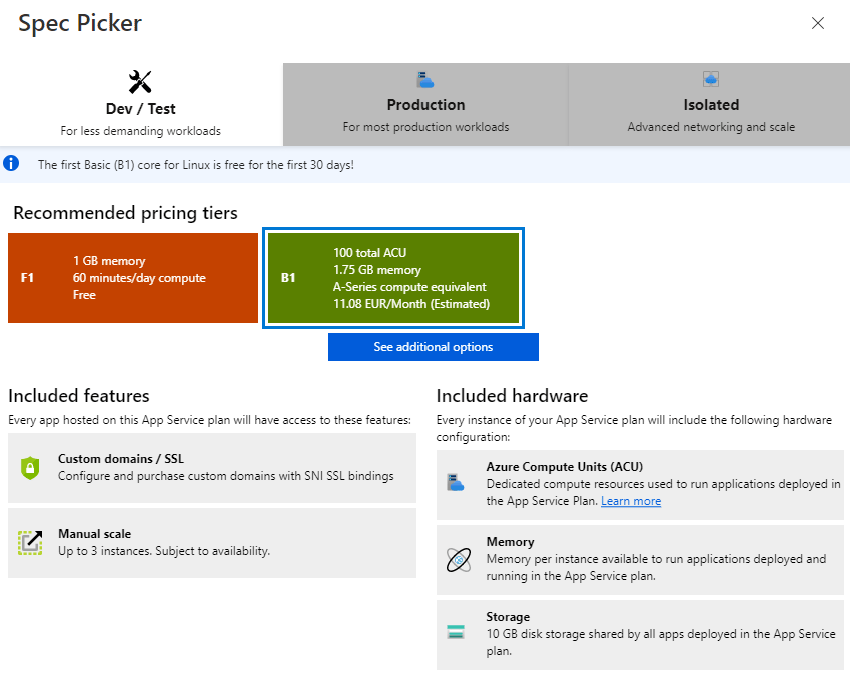
- Create a new Linux Service Plan to host the Web App. Select the B1 Basic plan to be able to continue to support Custom Domains and TLS Certificates. Notice that the B1 Basic plan on the Linux machine has an estimated cost of about 11€/month. This is a significant difference with the B1 Basic plan on a Windows machine, which was about 46€/month.
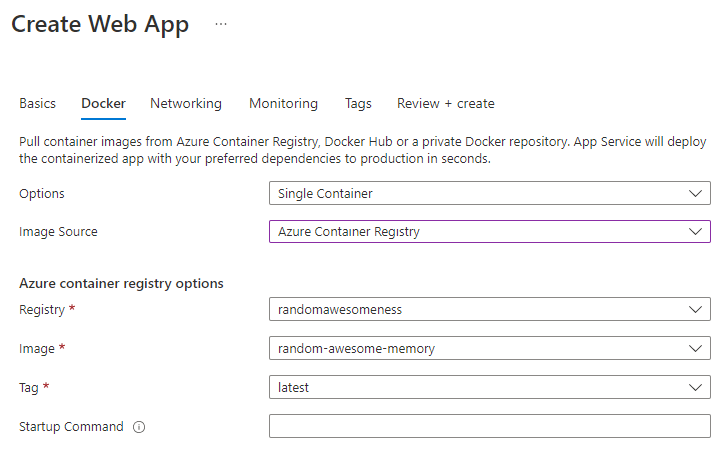
- When a Docker Container is being published, the section Docker is available as the next section in the configuration. Click Next: Docker
- In this section we can define which image will be used to deploy to the App Service and where it comes from.
- In the Options, I select Single Container beacuase it will suffice for my application.
- The Image Source is Azure Container Registry. That is my image store.
- Then you need to select the Registry and Image you wish to use.
- In the Tag property you will see it had the value latest in the list. That's the image we published from Visual Studio.
- In the Monitoring section, you can select to create a new Application Insights instance. Since I didn't remove the Application Insights instance of the previous App Service, I'm going to reuse that one.
- Continue to the Review + Create section and click Create.
Cannot perform credential operations for /subscriptions/{YOUR_SUBSCRIPTION}/resourceGroups/{YOUR_RESOURCEGROUP}/providers/Microsoft.ContainerRegistry/registries/{YOUR_REGISTRY} as admin user is disabled. Kindly enable admin user as per docs: https://docs.microsoft.com/en-us/azure/container-registry/container-registry-authentication#admin-account
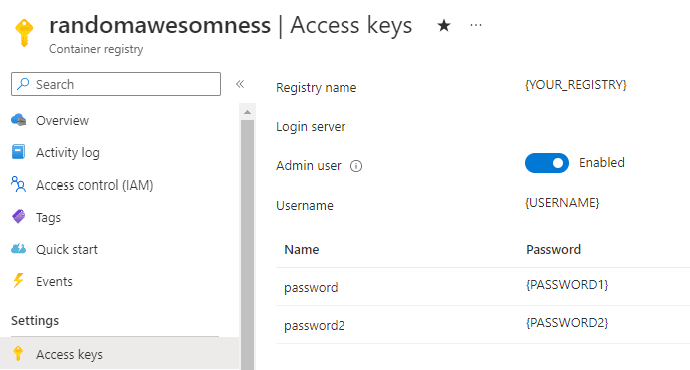
To be able to deploy a Docker image from the Azure Container Registry, the App Service needs to have permissions to access the ACR. The quick and dirty solution to allow this is to enable an admin user as follows:
- Navigate to your Azure Container Registry instance
- In the Settings section, select Acces keys
-
There you will find a checkbox Admin user, enable it.
- Reproduce the previous steps to create the Web App. This time, it should work. The Web App Service is created, the image spins up and the website works correctly.
Beacuase we deleted the previously created Windows App Service, we lost all the changes we made to have a Custom Domain and TL Certificate. So these steps need to be reproduced again. Check out the articles Map a custom domain to your App Service and Secure the domain using a TLS certificate again. There's no difference to configuring these in either a Windows or Linux App Service.
Up and running again
Ok, my website is up and running again, just the way it was before. This time in a Linux App Service using a Docker image instead of a regular web application running in IIS on a Windows machine. But there's still something bothering me. When I publish the image from Visual Studio to the Azure Container Registry, it doesn't really do anything to the App Service. The App Service is not aware that a new version of the image has been pushed. This means that the App Service needs to be restarted in order for the new image to be spun up when the App Service starts. That's unacceptable when I deploy my website.
Continuous Deployment
When you push an image to an Azure Container Registry, a container needs to be actively spun up in the App Service using this new image. The mechanism for this action is called Continuous Deployment. There are several ways of making sure this happens automatically. For now I'm going to describe the easiest way for the simple use case of my website. I activated this as follows:
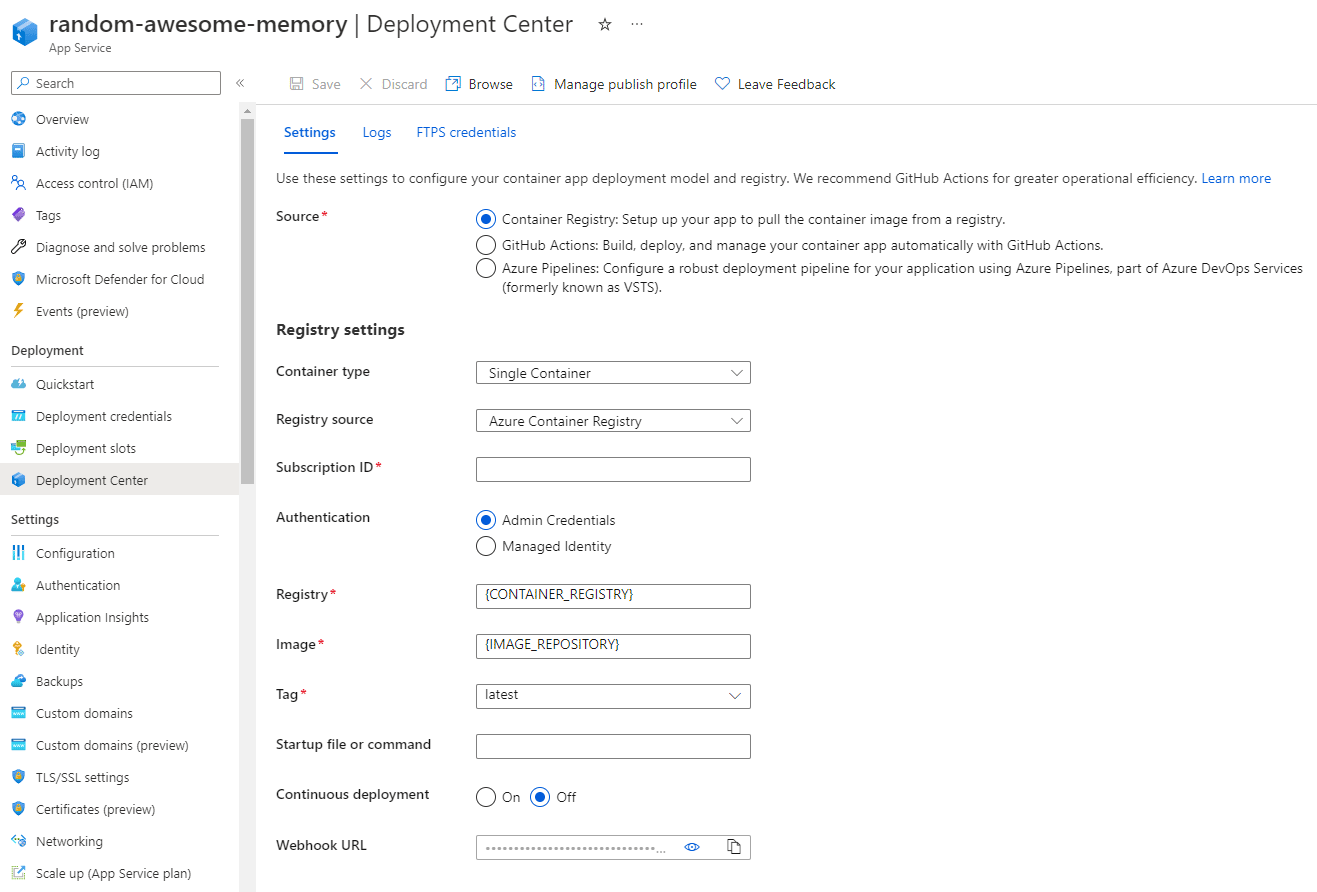
- Navigate to your App Service. In my case this is 'random-awesome-memory'
- In the left menu Deployment section, navigate to Deployment Center
- In the default selected Settings tab, you will see the Docker settings we configured earlier when creating the Web App Service. At the bottom, there's a setting called Continuous deployment, make sure to check the On value. Don't forget to save the changes in the top menu.
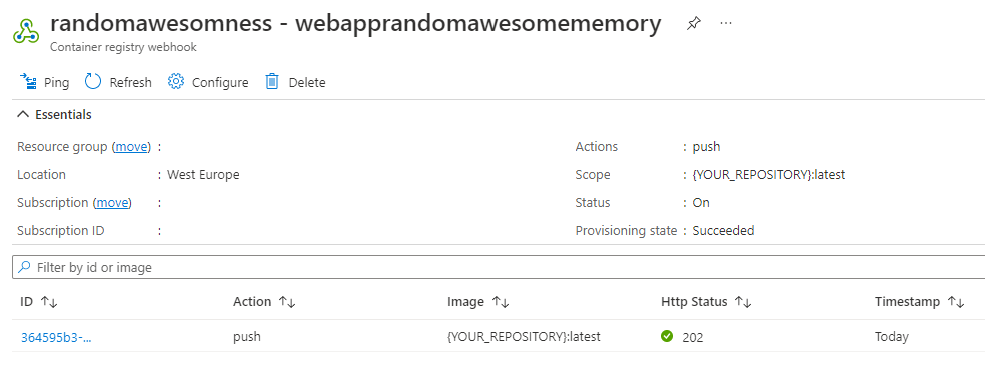
When the Continuous Deployment is activate and saved, a webhook is created in your Container Registry.
Navigate to your Azure Container Registry instance, then select Webhooks in the left menu in the Services section.
You will get an overview of all the webhooks configured in the Container Registry.
In my case, there's only one and that's the one we just activated in the Continuous Deployment.

Navigate further down the list to see more details of the webhook.
In short, what it does is, it reacts to the push action of the image defined in the scope, which in my case is the image with the tag latest.
This can be configured more granularly but for now I'm going to leave it the ways it is.
If you want to dig any further, check out the details of the webhook's request and response objects.
So, now that the Continuous Deployment has been configured, the App Service will restart automatically each time a new image has been pushed into the Container Registry.
Azure App Service Documentation
Check Migrate custom software to Azure App Service using a custom container for more details on Custom Containers
Azure App Service Documentation
Check Continuous deployment with custom containers in Azure App Service for more details on Continuous Deployment with Custom ContainersConclusion
I was able to get rid of the costly B1 Basic App Service plan in Windows by replacing it with the B1 Basic plan in Linux. The cost was reduced from 46€/month to 11€/month. An additional cost of 5€/month was also added for the Azure Container Registry. So the total cost of running the website is 16€/month. But, beacuase I scaled the App Service Plan to Basic B1, I'm also able to add additional applications or websites to it without extra charges. Also the Azure Container Registry is not just limited to this website. It will be used to store images for other websites and applications as well.
Documentation Reference
- Docker - Get started with Docker for Windows
- Azure Container Registry Documentation - Azure Container Registry
- Azure Container Registry pricing Documentation - Container Registry pricing.
- Azure Container Registry Documentation - Azure Container Registry service tiers
- Azure Pricing Documentation - App Service pricing
- Azure App Service Documentation - App Service on Linux
- Visual Studio Documentation - Container Tools in Visual Studio
- Visual Studio Documentation - How to customize Docker containers in Visual Studio
- Azure App Service Documentation - Migrate custom software to Azure App Service using a custom container
- Azure App Service Documentation - Continuous deployment with custom containers in Azure App Service