Buy a domain name
The first step you need to take is buy/register a domain name. In case you have already acquired one, you can skip this step. You can do this with any Domain Provider, and there's a lot of them. Check if the domain name you wish to register is still available, hopefully it is. And then just buy it. I never buy a domain name unless I'm absolutely sure that I'm going to use it for a personal or professional project.
You can also buy a domain name in Azure.
Azure App Service Documentation
Check Buy a custom domain name for Azure App ServiceDo realize that when you do this in Azure, you have to do this via App Service Domain, which also brings an extra cost.
Azure App Service Pricing
Check App Service Domain Pricing for more detailsNext to domain registration in Azure, this also makes use of Azure DNS to host the domains, so extra cost for that is taken into account as well.
Azure DNS Pricing
Check Host your Domain Name System (DNS) domain in Azure for more detailsI'm not going to do this via Azure beacuase the cost is a little too high for me. I've been buying my domain names via the same Domain Provider for years now. And I'm not going to do this any differently for now. The downside of the way I'm doing it now is that I'm dependant on an external platform. If you do this in Azure, it's all centralized in one place and it's easier to maintain. But for now, I'm willing to sacrifice the ease of use in exchange for the low cost.
Make sure that your App Service Plan is at least of type D1 Shared or higher. The Free Plan doesn't support Custom Domain Names. I have already done that in the previous article so off we go.
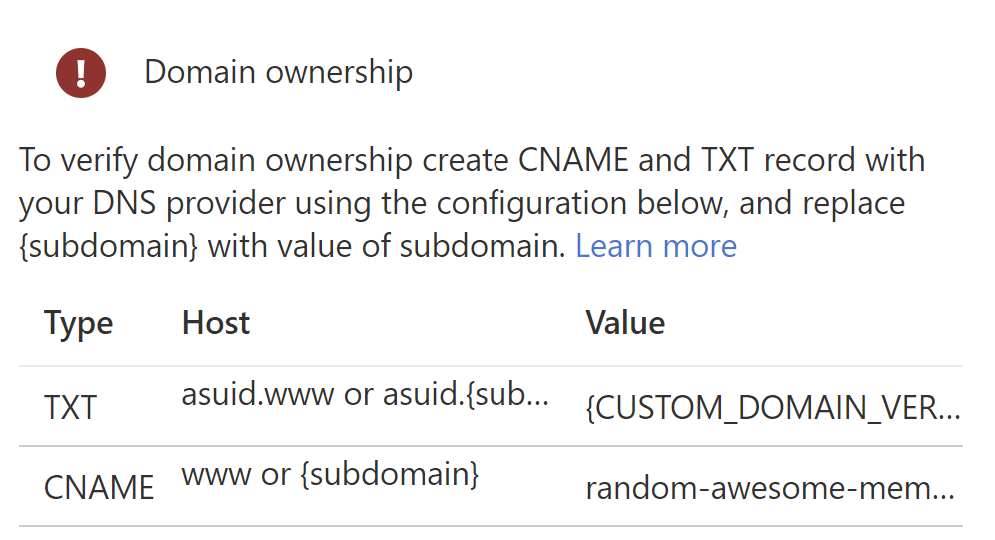
Get a hold of the App Service Custom Domain Verification Id
Well that's a mouth full. This ID is required to configure your DNS settings and to verify domain ownership. But we'll come to that in a second.
- In Azure, navigate to your App Service, to me, that's my random-awesome-memory App Service.
- In the side menu pane, click on Custom Domains page under the section Settings. There you will find the Custom Domain Verification Id. Copy it to your clip board.
Azure Security Fundamentals Documentation
Check Prevent dangling DNS entries and avoid subdomain takeover for more information on how this Id can prevent subdomain takeovers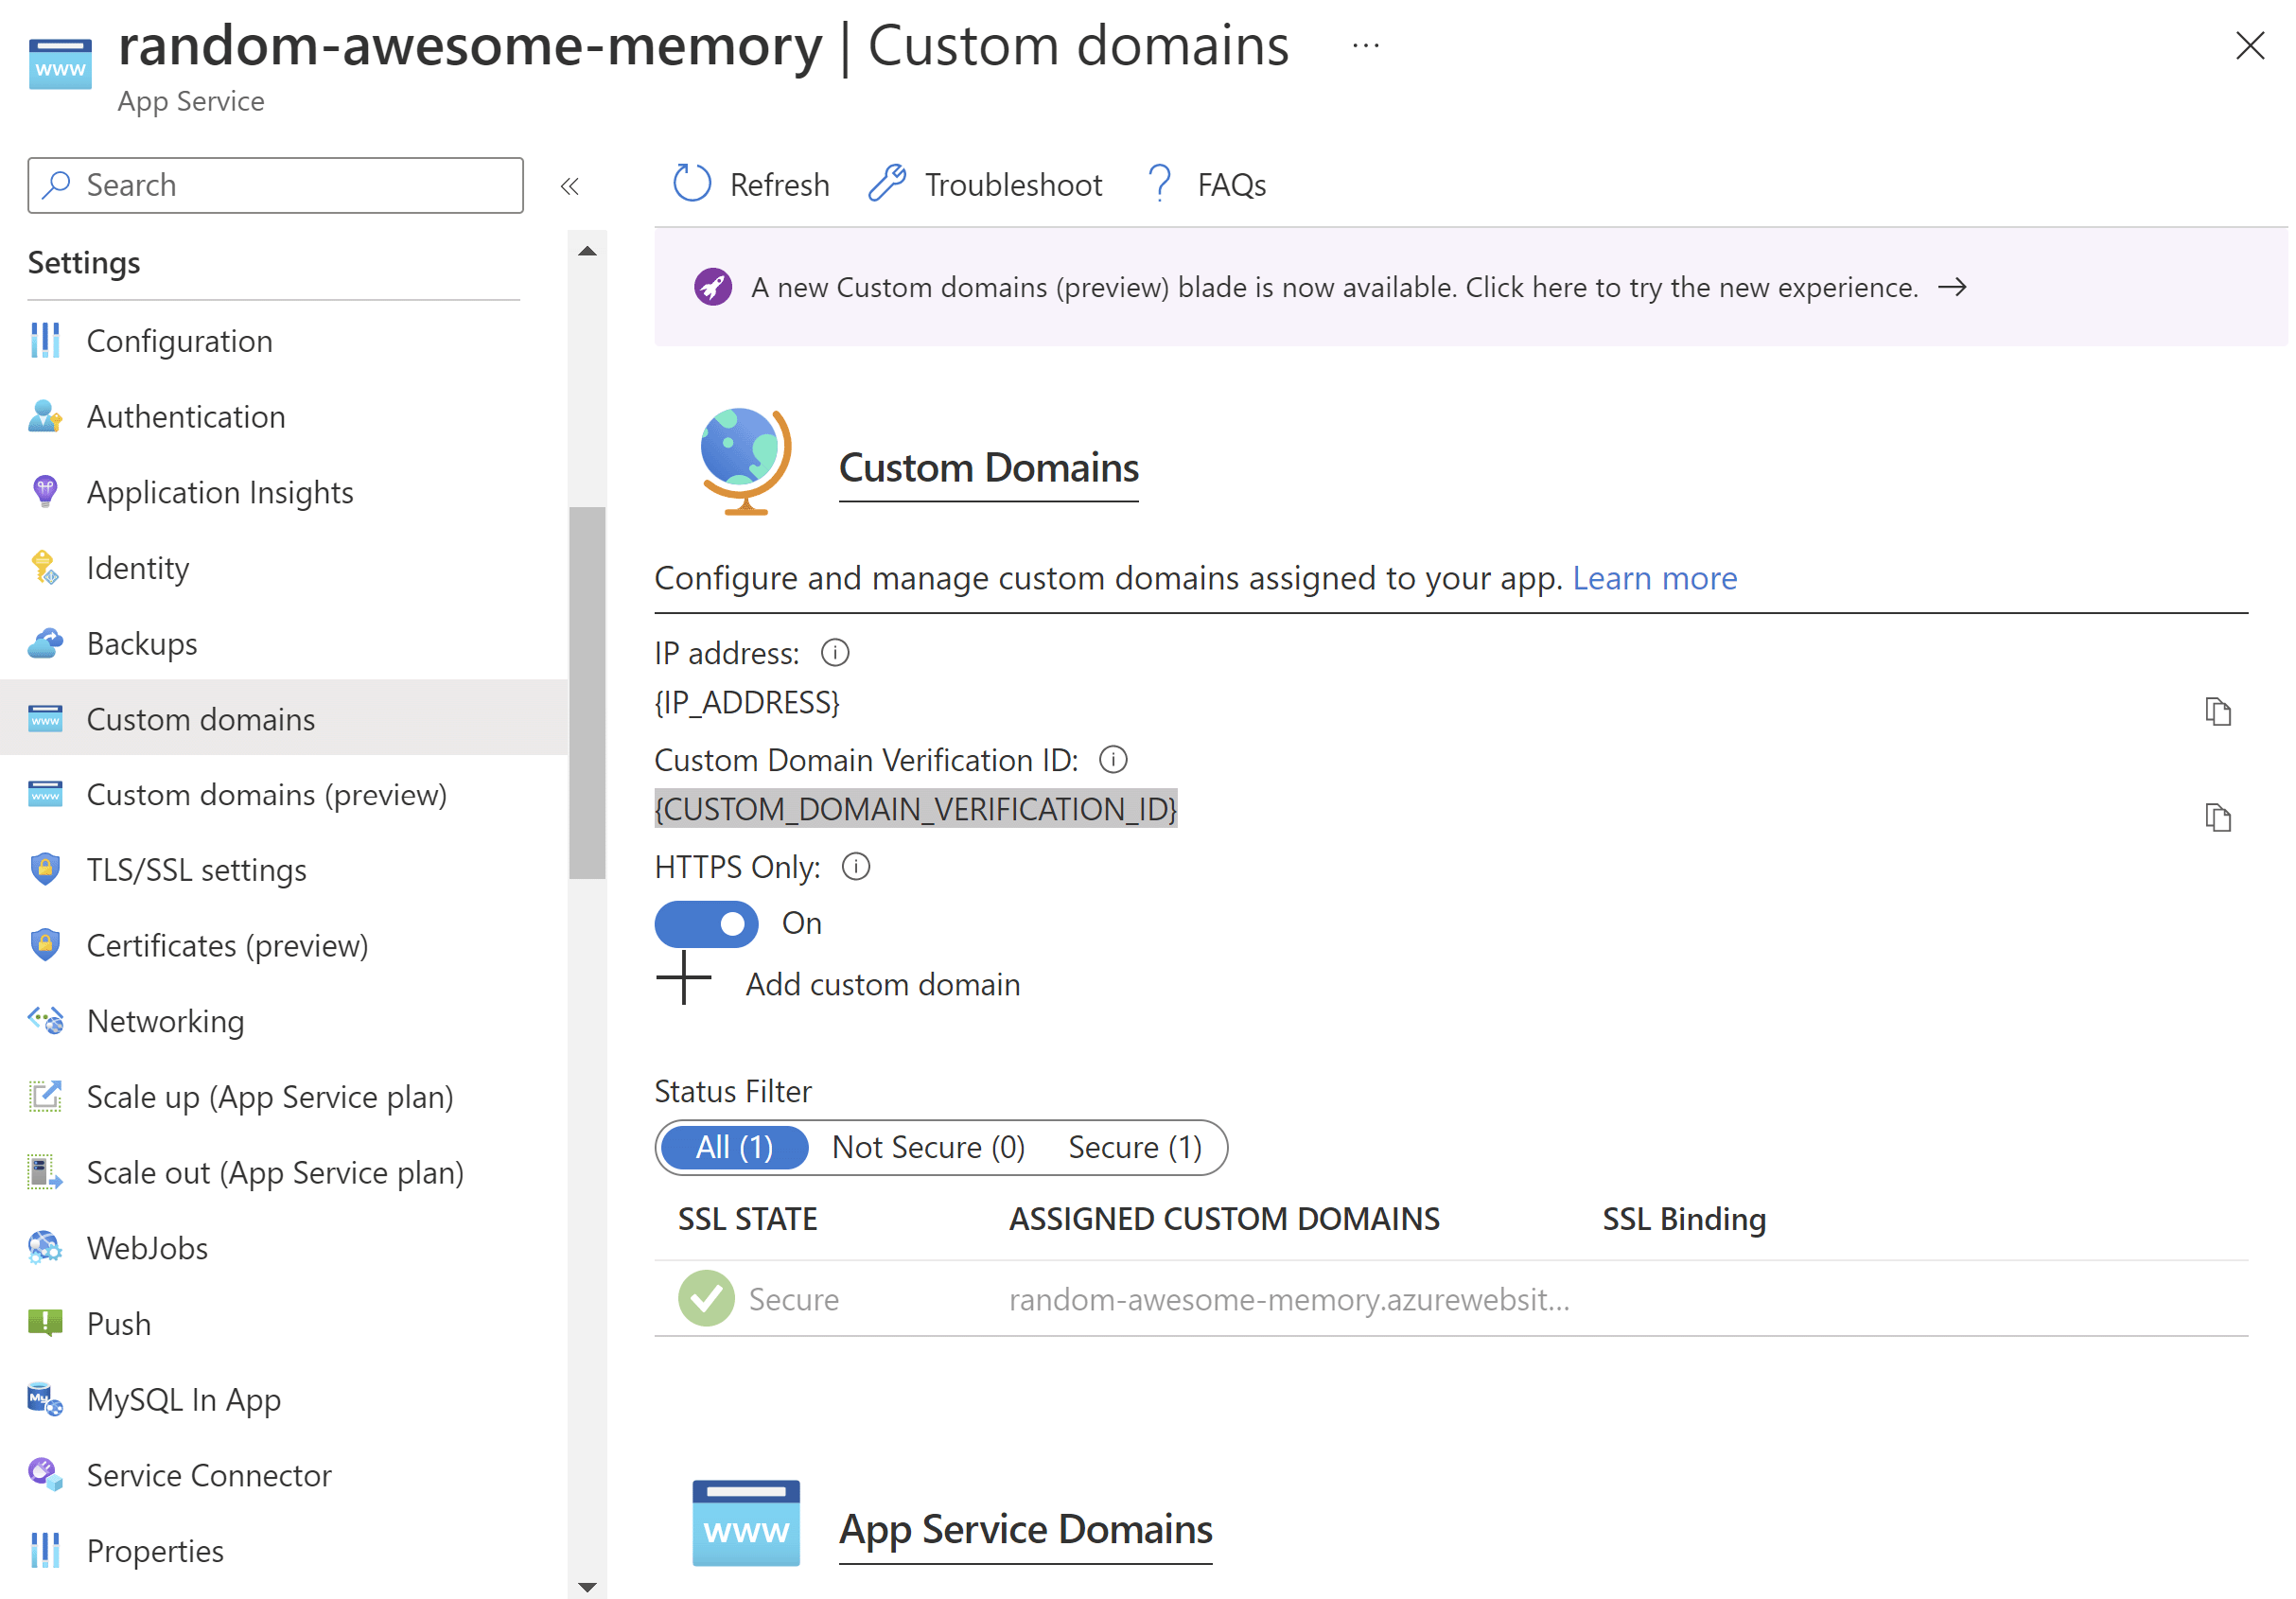
Create the DNS records
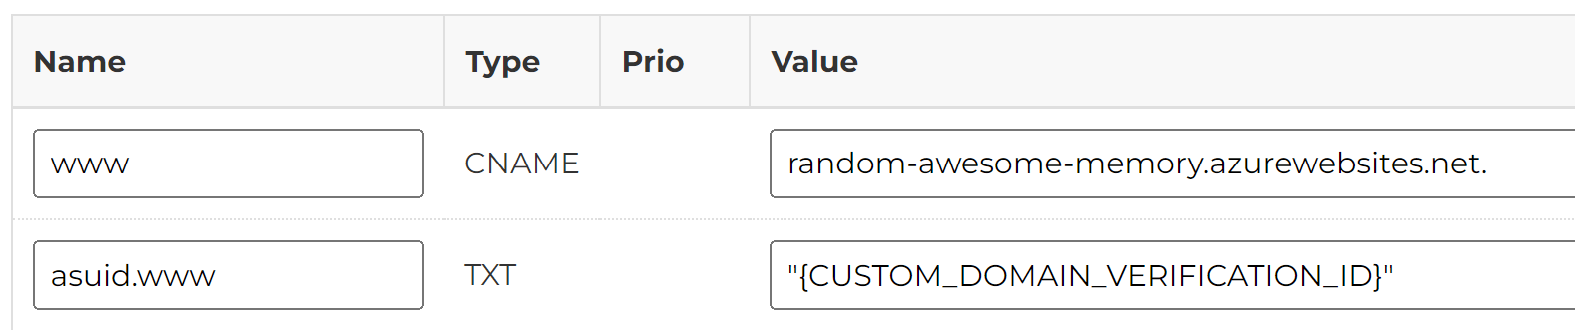
The next step is to configure your DNS records. Beacuase I have registered my domain name at my Domain Provider, I need to configure my DNS settings there. I can easily access the DNS Management on their website. I added the DNS record using a CNAME and mapped it to the default hostname, being 'random-awesome-memory.azurewebsites.net'.
App Service Documentation
Check DNS record types for more details
- So, for the CNAME record I use 'random-awesome-memory.azurewebsites.net.'. Mind the dot in the end. I don't know if this is default or related to my Domain Provider but I had to add that in the end or it didn't work.
-
And I add another record of type TXT with the Custom Domain Verification ID of the App Service, which we fetched earlier.
Then save the changes and wait.
Add the Custom Domain in the App Service
The following steps were taken:
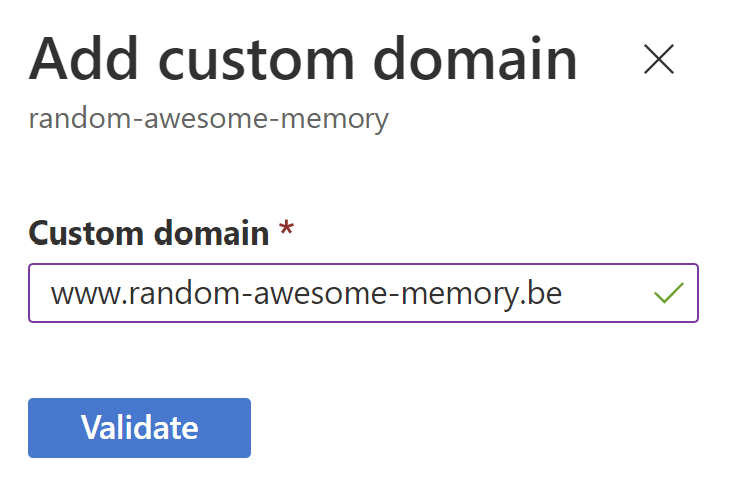
- Navigate to the Custom Domains page of your App Service again. Click Add Custom Domain.
-
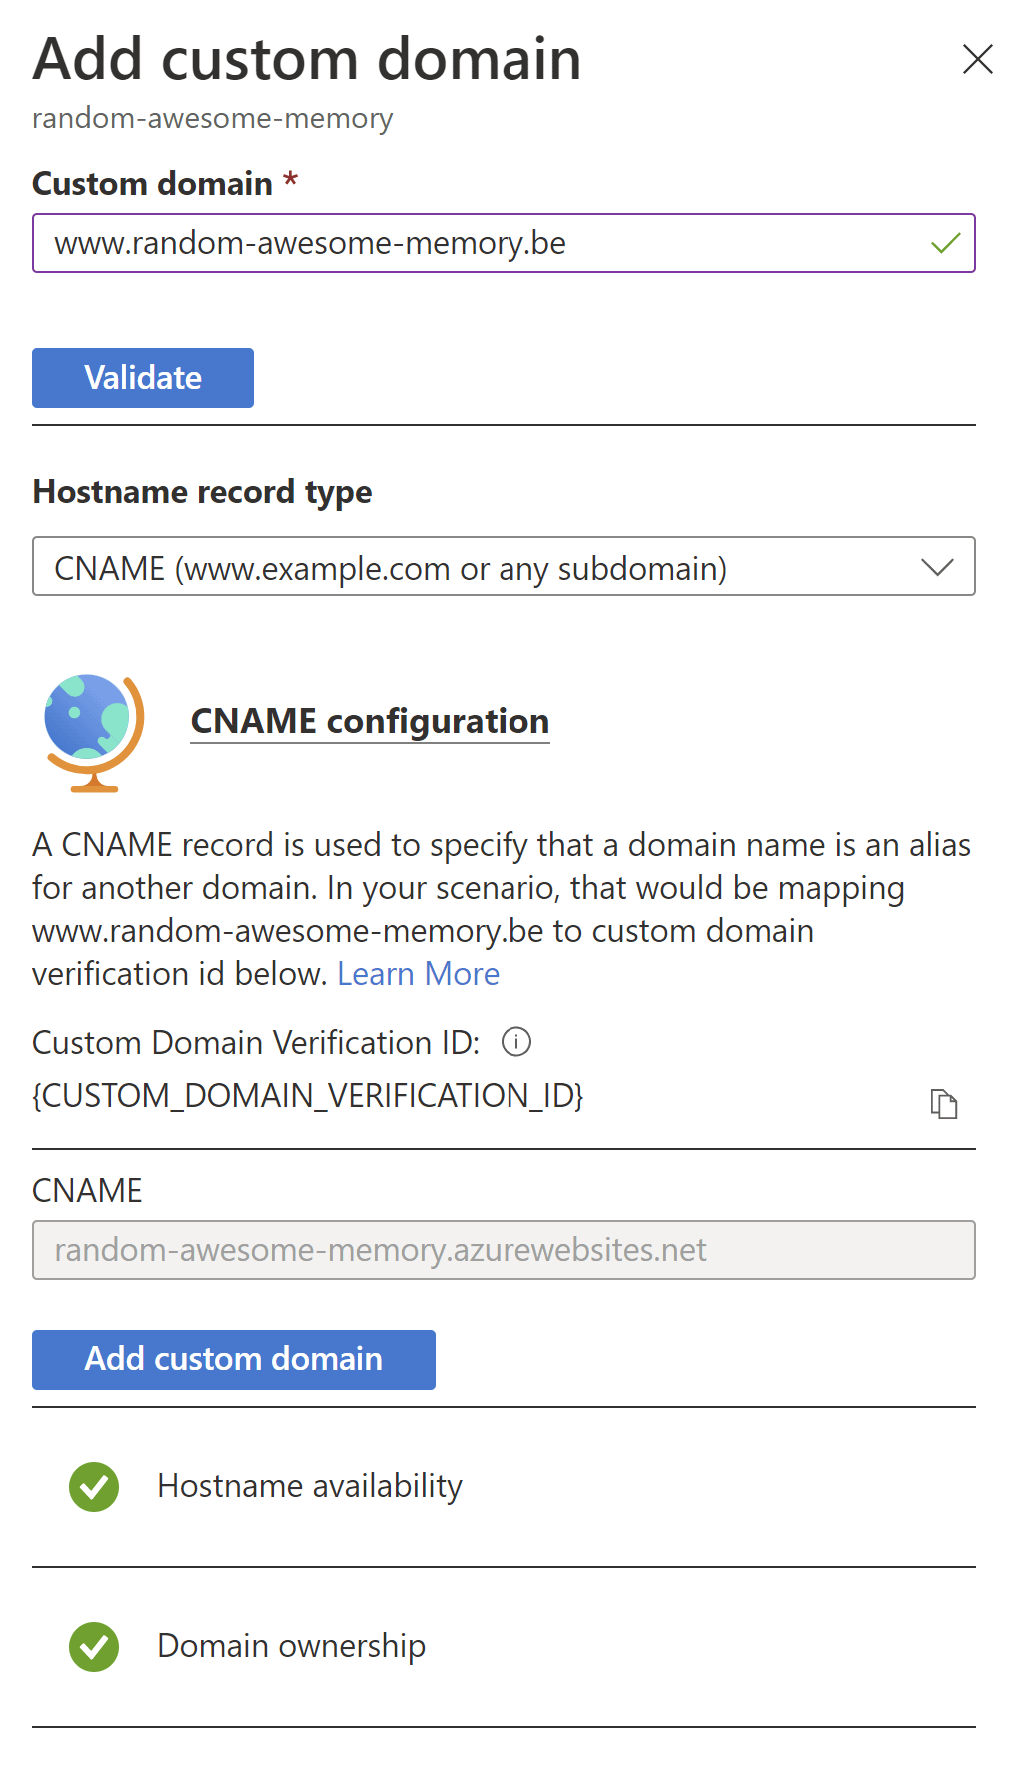
Add the fully qualified Custom Domain name, which in my case is 'www.random-awesome-memory.be'. Click Validate.
- The hostname record type has to be set to CNAME, as described and configured earlier.
- If the DNS settings were correctly configured before, the CNAME will be filled in with the same value that was set into the DNS settings. In this case it was 'random-awesome-memory.azurewebsites.net'.
-
When the validation checks succeed, meaning the hostname is available and the domain ownership has been verified, click Add Custom Domain.
- And voila, the new url to your website should work.
In case you were too fast, trying to map the Custom Domain in the App Service, right after configuring the DNS settings, you might get some validation errors.
Be sure to try again later in case the DNS changes haven't been registered yet.
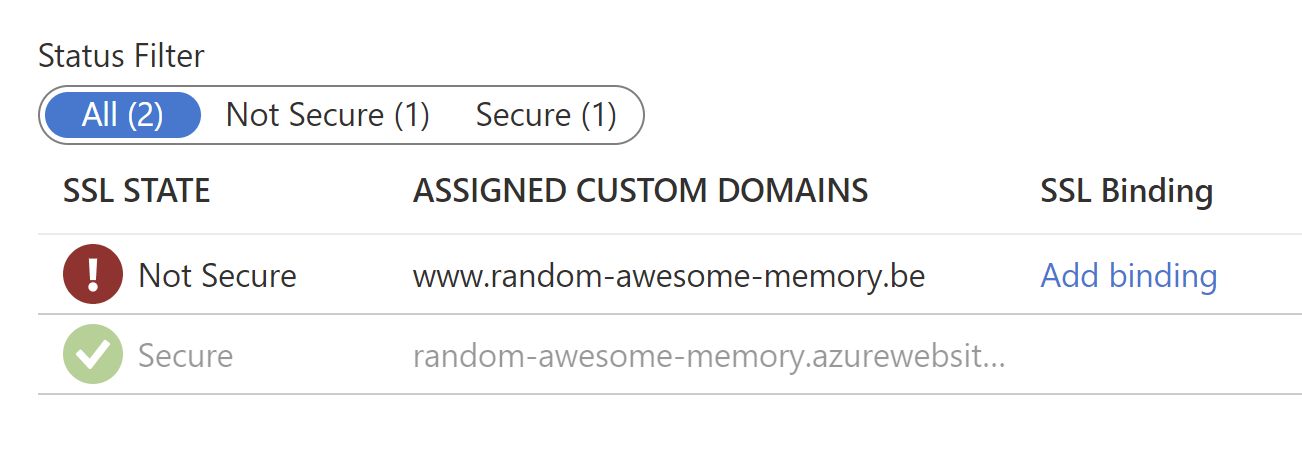
After adding the Custom Domain, you will probably see a warning message saying:
You have custom domains that are not secured and will cause browser warnings/errors when accessed over https. Click on "Add binding" to secure your custom domains..The reason for this is beacuase the domain hasn't been secured with a certificate yet. Uncheck the HTTPS Only option to make sure the traffic isn't redirected to HTTPS for now. This isn't a disaster but surely a best practice for any website.
The result of course is this:
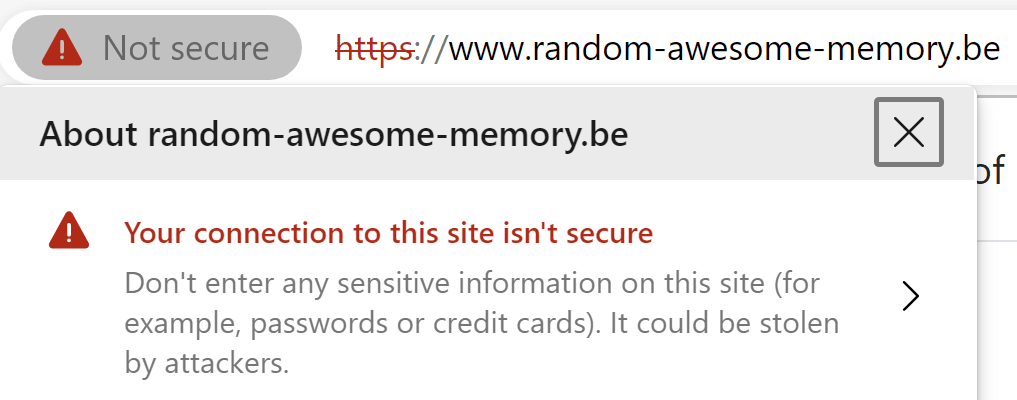
Since it's a simple website and you don't need to give my your bank account credentials anywhere, I'll leave it the way it is for now. This will be addressed later.
Conclusion
Yet another process made easy with Azure. I do recognize the fact that using the App Service Domain would be easier and centralized in Azure. But instead I chose for a regular Domain Provider. Although my Domain Provider recently introduced an extra cost to Manager the DNS settings per domain name, it clearly doesn't come near the cost of the Azure App Service Domain and Azure DNS solutions.
Documentation Reference
- Azure App Service Documentation - Buy a custom domain name for Azure App Service
- App Service Documentation - Tutorial: Map an existing custom DNS name to Azure App Service
- Azure Security Fundamentals Documentation - Prevent dangling DNS entries and avoid subdomain takeover
- App Service Documentation - DNS record types
- Azure App Service Pricing - App Service Domain Cost
- Azure DNS Pricing - Host your Domain Name System (DNS) domain in Azure